The Secret to a Leak-Free Roof: Step-by-Step Flashing Tape Installation Guide
Are you tired of dealing with leaks and water damage in your home? Improper flashing tape installation might be the culprit! However, even the smallest mistake in installing flashing tape can lead to significant problems, including leaks and water damage. This comprehensive guide will walk you through the step-by-step process of installing flashing tape correctly, ensuring a leak-free roof for years to come.
Here are what you’ll learn:
- Understanding Flashing Tape: Gain insight into the critical role of flashing tape in preventing leaks and protecting roof intersections.
- Tools and Materials Needed: Learn about the essential tools and materials required for a successful installation.
- Step-by-Step Installation Instructions: Follow detailed instructions to achieve a precise and leak-proof installation, ensuring your roof remains watertight and secure.
- Common Mistakes to Avoid: Avoid common pitfalls that could undermine your installation, resulting in a more reliable and professional finish.
- Maintenance and Inspection Tips: Discover how regular maintenance and inspections can extend the lifespan of your flashing tape and prevent costly repairs.
- Act Fast for a Leak-Free Roof: Take decisive action with expert advice on selecting and using high-quality flashing tape.
Understanding Flashing Tape
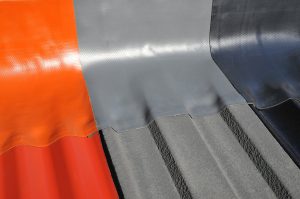
Before diving into the installation process, it’s important to understand what flashing tape is and why it’s so crucial for your roof. Flashing tape is a self-adhesive, malleable material used in roofing to create a watertight seal at joints and edges. It’s designed to replace traditional lead flashing and can be used on various roof profiles, including tiles, metal, and polycarbonate.
What Makes Flashing Tape Essential?
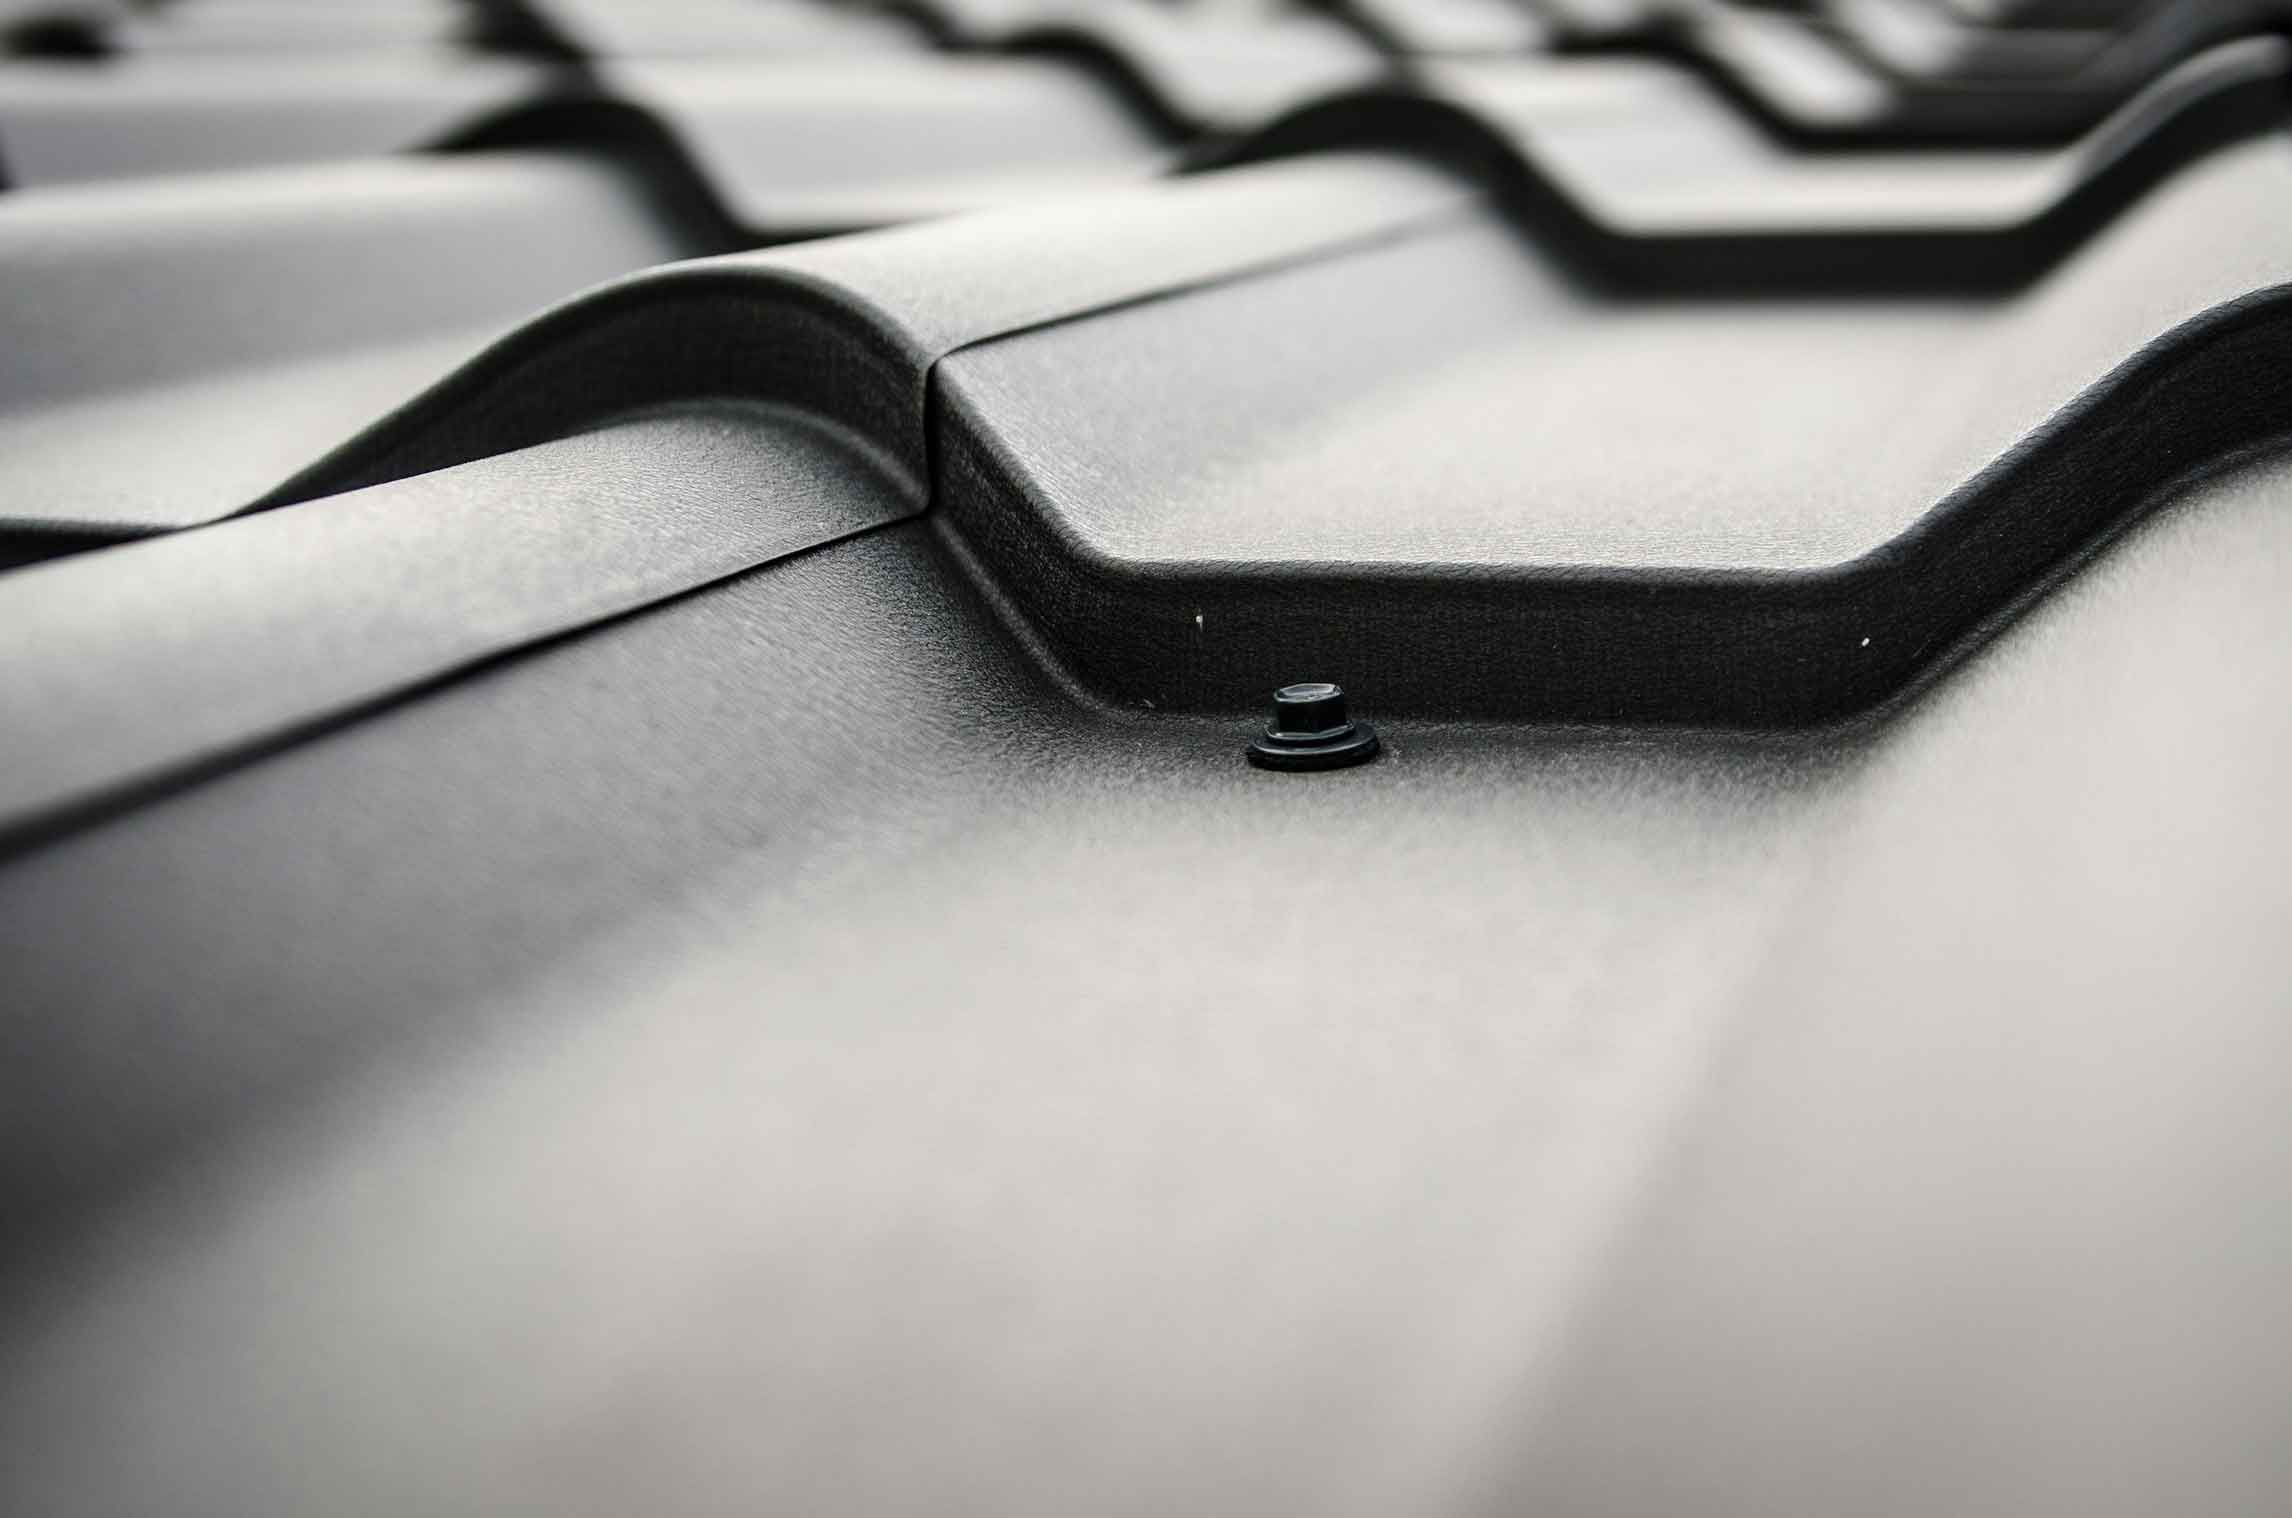
Flashing tape is critical for preventing leaks at roof intersections, around chimneys, vents, skylights, and other roof penetrations. It provides a durable, watertight seal that adapts to the movements of the building, ensuring long-term protection against the elements. With proper installation, flashing tape can significantly extend the lifespan of your roof.
What is Wakaflex Flashing Tape?
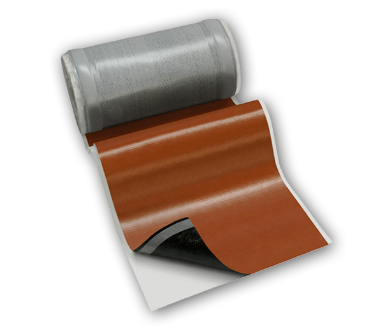
Wakaflex is a leading, innovative, lead-free roofing flashing solution designed to replace lead in all roof applications. Suitable for nearly all roof profiles and types, including tiles, metal, and polycarbonate, Wakaflex has become the most popular lead-free flashing tape worldwide. Celebrating over 10 years of success, Wakaflex has sold over 6 million rolls in 40 countries, making it a trusted choice for professionals and DIYers alike.
Tools and Materials Needed
To ensure a successful installation, you need the right tools and materials. Here’s what you’ll need:
Tools:
- Utility knife
- Measuring tape
- Roller
- Scissors
- Cleaning materials (brush, cloth, mild detergent)
Materials:
- Wakaflex flashing tape
- Primer (if needed)
- Sealant (optional for extra security)
Why Choose Wakaflex?
Wakaflex requires no specialist tools, saving time and labor costs. Its malleability provides a tight seal immediately, making it perfect for use in pitch transitions, wall abutments, dormers, and chimney flashings. Plus, Wakaflex is non-toxic, lightweight, and easy to handle, ensuring a smooth installation process.
Step-by-Step Installation Instructions
Now, let’s dive into the step-by-step process of installing Wakaflex flashing tape. Follow these instructions to ensure a watertight seal and a leak-free roof.
- Preparing the Surface
Proper surface preparation is crucial for the effective adhesion of the flashing tape. Here’s how to do it:
- Clean the Surface: Use a brush and cloth to remove any dirt, dust, or debris from the surface. For stubborn grime, use a mild detergent solution and rinse thoroughly. Ensure the surface is completely dry before proceeding.
- Inspect for Damage: Check for any cracks, holes, or irregularities in the surface. Repair any damage to ensure a smooth, even surface for the tape to adhere to.
- Apply Primer (if needed): Depending on the surface material, you might need to apply a primer to enhance adhesion. Follow the manufacturer’s instructions for application and drying times.
- Measuring and Cutting the Tape
Accurate measurements and clean cuts are essential for a professional finish. Here’s how to measure and cut the tape:
- Measure the Area: Use a measuring tape to determine the length of tape needed for the area you’re working on. Be sure to account for any overlaps.
- Cut the Tape: Using a utility knife or scissors, cut the tape to the required length. Round the corners to prevent peeling and ensure better adhesion.
- Applying the Tape
Applying the tape correctly is crucial for a watertight seal. Follow these steps:
- Position the Tape: Carefully position the tape over the area to be sealed. Ensure it is aligned correctly before removing the backing. Retain the basic shape while turning the tape over.
- Remove the Backing: Slowly peel off the backing paper, pressing the tape onto the surface as you go. Smooth out any wrinkles or bubbles to ensure a tight seal.
- Press Firmly: Use a roller to press the tape firmly onto the surface. This ensures good adhesion and a secure seal.
- Sealing the Edges
Sealing the edges provides extra protection against water infiltration. Here’s how to do it:
- Press the Edges: Use a roller or your fingers to press the edges of the tape firmly onto the surface. Ensure there are no gaps or loose edges.
- Apply Sealant (optional): For extra security, apply a bead of sealant along the edges of the tape. This provides additional protection against water ingress.
Tips and Tricks from Experts
- Temperature Matters: Install flashing tape in temperatures above 40°F (4°C) for optimal adhesion.
- Overlap Sections: When joining two sections of tape, overlap them by at least 2 inches (50mm) and press firmly to create a watertight seal.
- Avoid Stretching: Do not stretch the tape during application, as this can cause it to lift and compromise the seal.
Common Mistakes to Avoid
Even experienced installers can face challenges. Avoid these common pitfalls to ensure a flawless application and maximize the effectiveness of your flashing tape:
Improper Surface Preparation
One major mistake is not preparing the surface adequately. Dirt, dust, or debris can prevent the tape from adhering properly, leading to leaks. To avoid this, clean the surface thoroughly before installation. Use a brush or cloth to remove loose particles, and if necessary, wash with mild detergent and water. Ensure the area is completely dry before applying the tape.
Incorrect Measuring and Cutting
Errors in measuring or cutting can result in gaps and poor alignment, compromising the seal. Measure carefully and cut the tape to the exact length needed. Use a sharp utility knife or scissors for clean cuts. Ensure that overlaps between tape sections are sufficient and edges are aligned correctly.
Poor Adhesion
Poor adhesion, characterized by wrinkles, bubbles, or loose edges, can create weak spots where water may seep through. Press the tape down firmly and use a roller to smooth out any imperfections. Ensure all edges are securely bonded and free of gaps. Address any issues immediately to maintain a strong, watertight seal.
By avoiding these common mistakes and focusing on careful surface preparation, accurate measuring, and good adhesion, you can ensure a successful and leak-proof flashing tape installation.
Maintenance and Inspection Tips
Regular maintenance and timely inspections are key to ensuring the longevity and effectiveness of your flashing tape. By staying proactive and addressing issues early, you can avoid costly repairs and maintain a secure, leak-free roof. Here’s how to keep your flashing tape in optimal condition:
Routine Checks
Conduct regular inspections of your roof, especially after severe weather events such as heavy rain, strong winds, or extreme temperatures. Aim to inspect your roof at least twice a year—spring and fall are ideal times. Be vigilant for any signs of damage or wear in the areas where flashing tape is applied.
Signs of Damage
Watch for these common issues that indicate potential problems with your flashing tape:
- Peeling Edges: If the edges of the tape start to lift, it can create gaps that allow water to seep in. This often results from poor adhesion or surface damage.
- Cracks: Visible cracks or splits in the tape can lead to leaks and further damage. Cracks are usually caused by extreme temperatures or physical impacts.
- Discoloration: Changes in color, often due to UV exposure, can signal degradation of the tape. This may affect the tape’s effectiveness and necessitate replacement.
Repair Tips
Address minor damage promptly to prevent it from worsening:
- For Small Issues: Clean the affected area, apply a new piece of flashing tape, and smooth out any wrinkles to ensure a tight seal.
- For Extensive Damage: Replace larger sections of tape if necessary. Ensure the surface is clean and dry before applying new tape, or consult a professional for significant repairs.
Wakaflex Durability
Wakaflex flashing tape is designed for long-term performance:
- Temperature Stability: It performs well across a range of temperatures, from -40ºC to 100ºC, maintaining its effectiveness in extreme conditions.
- UV Resistance: Its UV-resistant properties help prevent degradation from sunlight, ensuring long-lasting flexibility and a strong seal.
- Chemical Self-Bonding: The tape’s chemical self-bonding ability ensures secure overlaps and a watertight seal, even in harsh weather.
Regular maintenance and timely repairs are crucial for extending the lifespan of your flashing tape and maintaining a leak-free roof. By following these tips, you can safeguard your home and prevent costly issues.
Act Fast for a Leak-Free Roof
Ensuring a leak-free roof is essential for protecting your home from water damage. By following this step-by-step guide, you can confidently install flashing tape and enjoy long-lasting protection. For the best results, choose Wakaflex flashing tape. Its lead-free, non-toxic composition, combined with ease of installation and superior performance, makes it the ideal choice for any roofing project.
Wakaflex is your trusted partner for high-quality flashing tape and roofing solutions. Our products are lead-free, non-toxic, lightweight, and easy to install. Wakaflex complies with AS/NZS 4020:2005 and has been tested by CSIRO to meet AS/NZS 2904:1995 standards. Its non-toxic properties and suitability for rainwater harvesting systems make it an eco-friendly choice for modern roofing needs.
Visit Wakaflex Website today to explore our range of flashing tapes and take advantage of expert advice and exclusive offers. Secure your home with the best – choose Wakaflex!
By following this guide and using Wakaflex flashing tape, you can ensure a leak-free roof and protect your home from water damage for years to come. Don’t wait until it’s too late – take action now and safeguard your investment with Wakaflex.